Project
This is wrap-ups from Brainhack school offical website
Goals
We expect each participants have different data analysis experience and distinct interests. Some participants without experience on brain data would like to learn baisc brain data analysis, but others might seek for advanced analystic techinique that will be beneficial to their research. No matter what the experience you have, your project should contain the new skills you have never learned. You should intensively implement your project in the 4-weeks Brainhack school and acquire these new skills. TAs will help you to build up the project that fit your needs. In the end of course, you should have two major outcomes for a project:
- Submit your project codes, website report, and slides on a Github repository. (The website report can be easily achieved by Jupyter notebook).
- Video recorded presentation
Note: Looking for example of project? You can find that from the past Brainhack School here.
Project Progress
preparation
- You will need to fill a form about your experience on brain data analysis, and keyword your are interesting. This information will help us to arrange TAs that will fit to your interests.
Assessments
| Item | Weightage | Team / Individual | Details |
|---|---|---|---|
| Final Project Report (Web-based Showcase) | 40% |
Team (20%) Individual (20%) |
Final Project Video (about 5–10 min) of the group project completed |
| Project Proposal Pitch (Data Blitz) | 20% |
Team (10%) Individual (10%) |
5-minute Pitch by group regarding proposed project |
| Assignment (Reflection Essay) | 20% | Individual | 2-page Essay to be submitted by the end of the course. Content is on the experience of the course (open to various forms) in terms of learning and perspectives on cultural intelligence |
| Class Participation (tutorial, module assignments) |
20% | Individual | For consistent attendance and active participation across the intensive 4–5 weeks of the course |
Project Submission Guide
To submit your project, you should (1) upload your slides of wrap-up presentation, and have (2) a public repository that contains your deliverables, such as code and report (or Jupyter notebook). Then, you should (3) prepare a introductory page and send a pull request to Brainhack School project pages.NEW! (4) Post your project (GitHub repository link and same introductory page) to the BHS International Discord server “Project- 2025”
Step 1: Upload your slides
Please upload your slides here
Step 2: Prepare a public repository on Github for your project
-
On your Github, create a public repository named
<your_name>_project, and initialize with aREADMEandLICENSEfile. (You already did this step in Git and Github module.) -
Clone your remote repository to your local drive. For example, I would like to clone the files on the repository to my
Documentsfolder under home directory, I can type the following code in terminal. Then, I shall found the files under~/Documents/<your_name>_project.cd ~/Documents # change the <USERNAME> to your github account, and <your_name> to your name on your Github repository git clone https://github.com/<USERNAME>/<your_name>_project.git cd <your_name>_project -
Open the
README.mdfile. Copy and paste all the contents from Brainhack School Project template. Follow the template and modify the text to show the necessary details for your project. ThisREADME.mdis a markdown file, so you should prepare it as markdown format, then Github and our website will render this markdown file on webpage as shown here and here. You can learn more about markdown format here, here, and here. Please ensure your page header is in markdown format, starting with three dashes (—) in the first row. You can embed your result figures in the README.md. However, please note that you should copy your figure files into the same folder and use the relative path to embed your figures. -
Copy all your deliverables into this folder, stage and commit your changes and push to repository. You have to input your Github username and personalized token as password when it prompt.
# You should copy all your deliverables to this folder before these lines # Otherwise, none of your files were uploaded git add -A git commit -m "upload my deliverables" git push -u origin main -
Check your repository, you should find that all your deliverables were uploaded and
README.mdwas updated. -
Please fill out the form here to let us know the links for your repository and slides. We will evaluate your performance accordingly.
Step 3: Fork the website and send a pull request for your project
-
Go to the Github repository for Brainhack School website. Click the
Forkon the page to fork this repository to your account.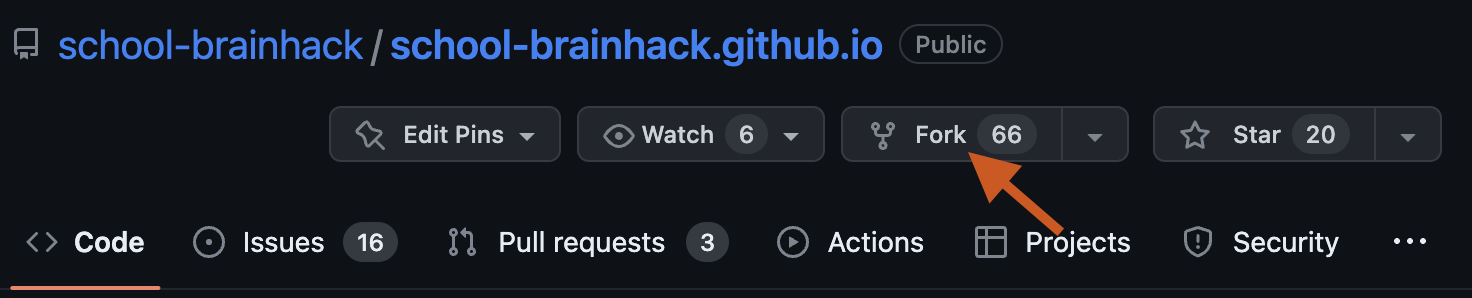
-
Leave everything as defaults, and click
create fork.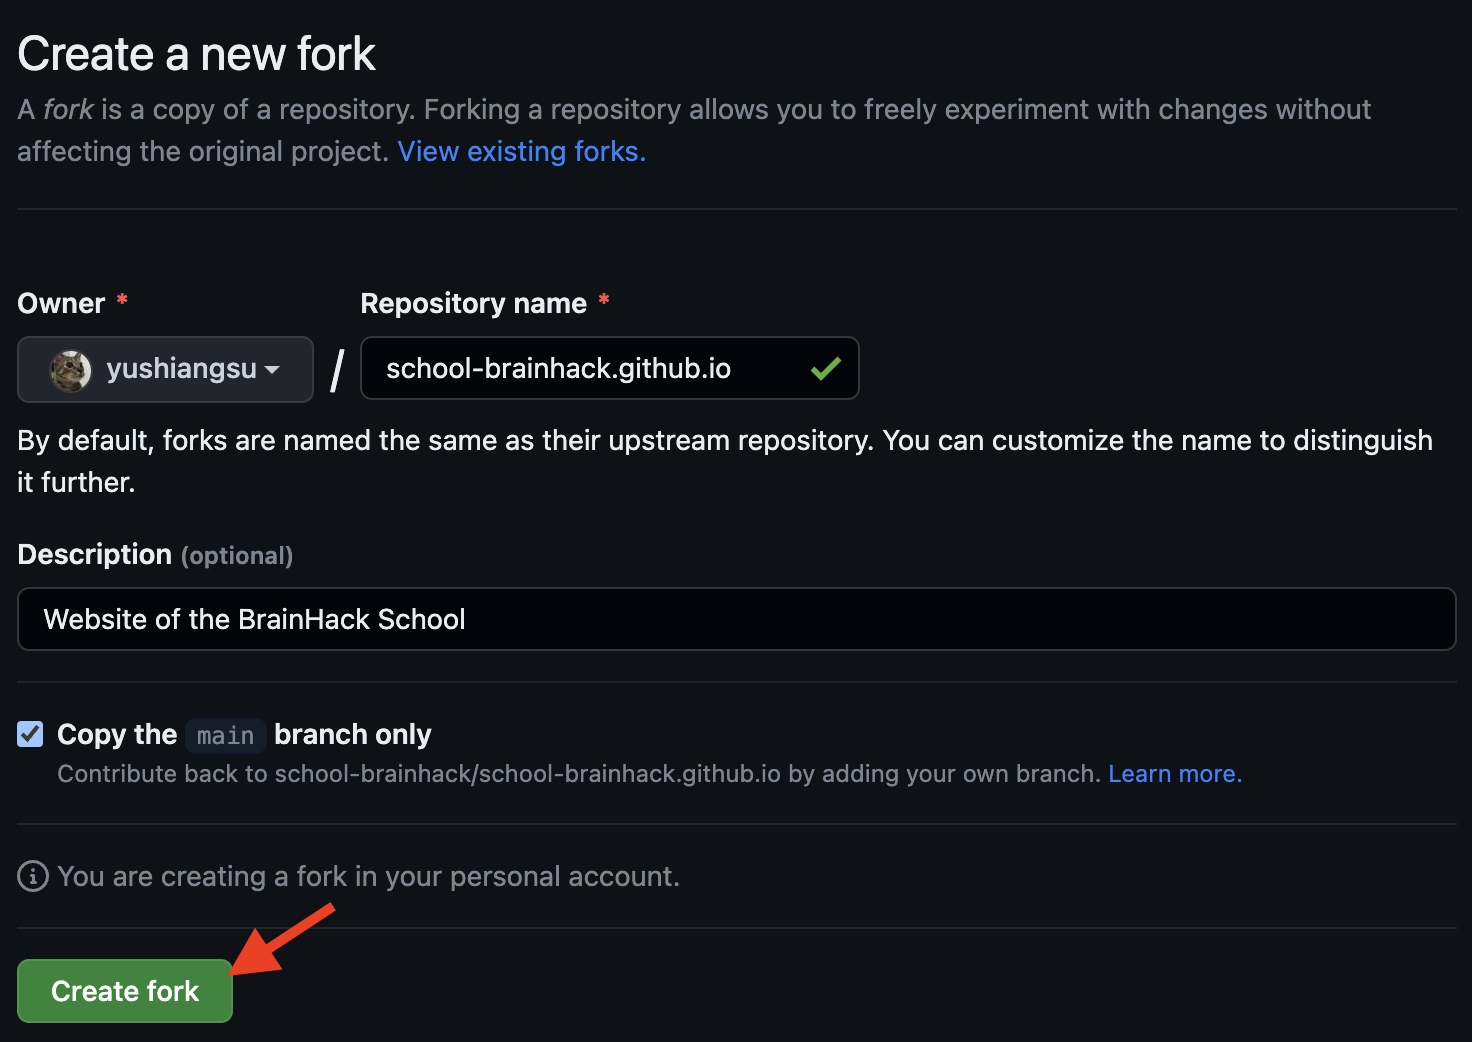
-
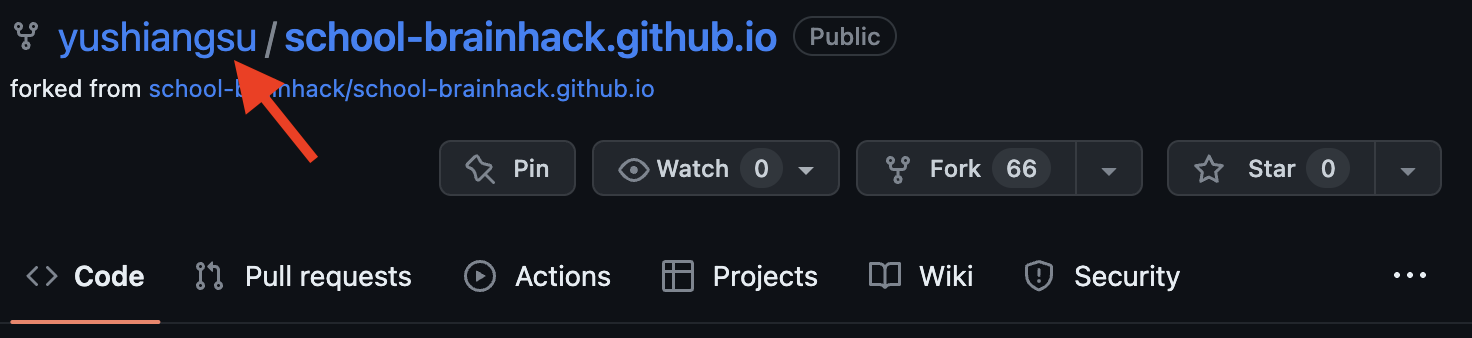
You should see that you forked the repository to your account.
-
Clone the forked repository to your local drive. Here, we demonstrated how to clone the repository to
Documentsfolder.cd ~/Documents # change the <USERNAME> to your github account git clone https://github.com/<USERNAME>/school-brainhack.github.io.git cd school-brainhack.github.io -
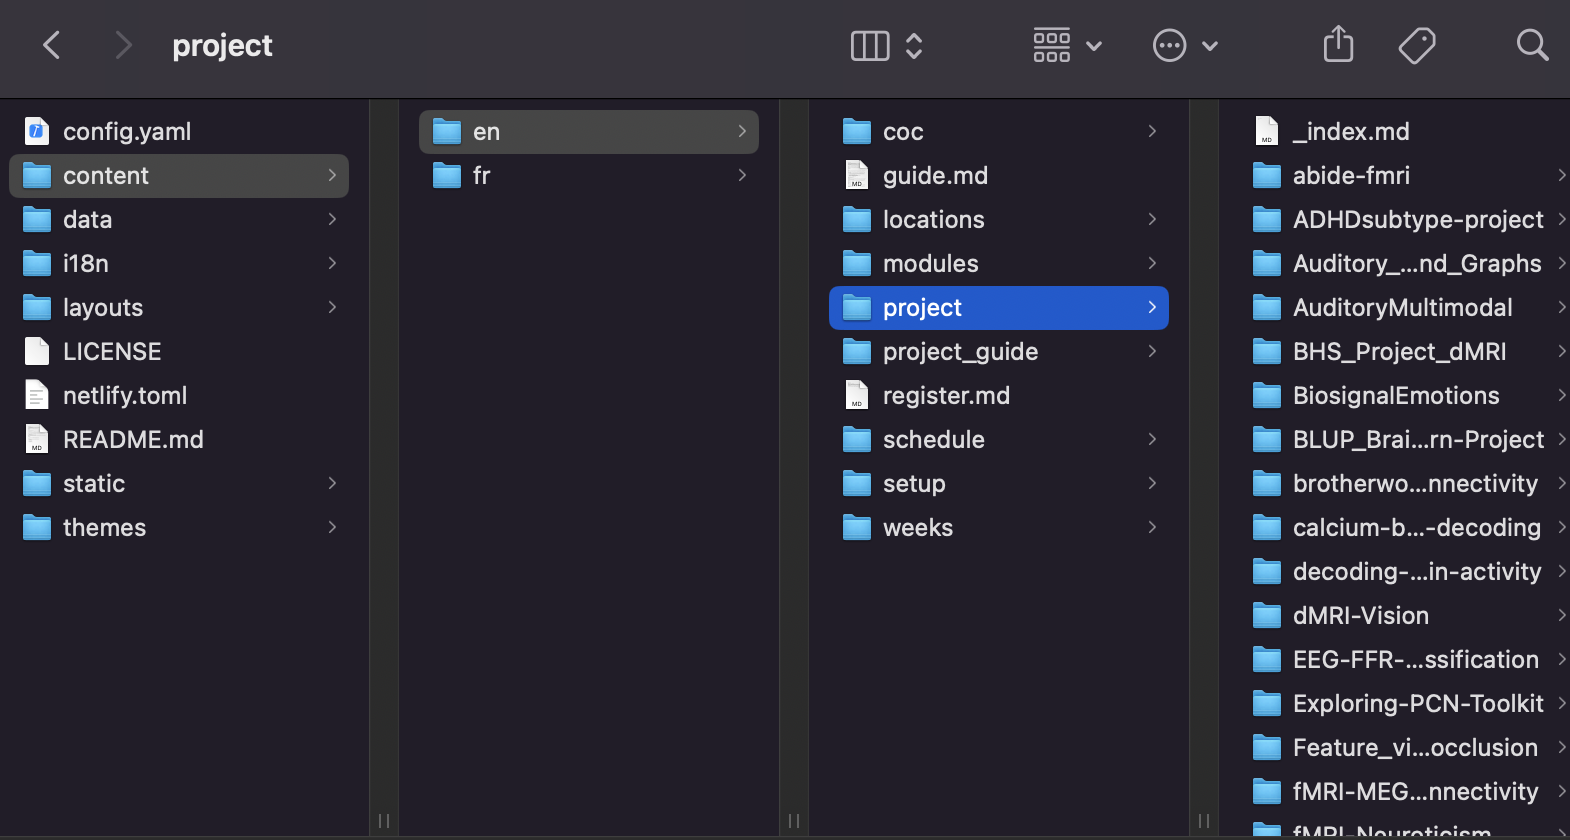
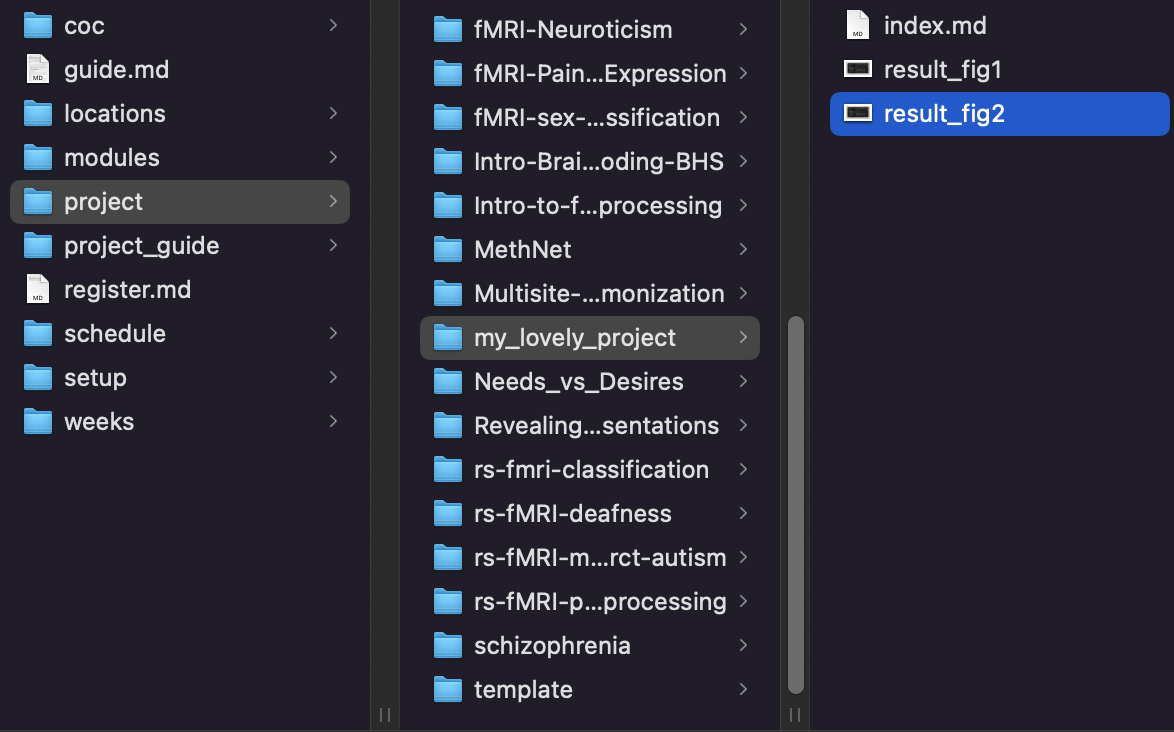
In the school-brainhack.github.io folder, navigate to school-brainhack.github.io/content/en/project
-
Create a folder for your project. The folder name should not have a space! You should replace any spaces with _. Then, copy your README.md (and your figure files if you embedded them in README) to the folder. Importantly, please rename the README.md to index.md.
-
Stage, commit and push to your forked repository.
# change the <your_folder_name> to the folder name for your project cd content/en/project git add ./<your_folder_name> git commit -m "upload a page for my project" git push -u origin main -
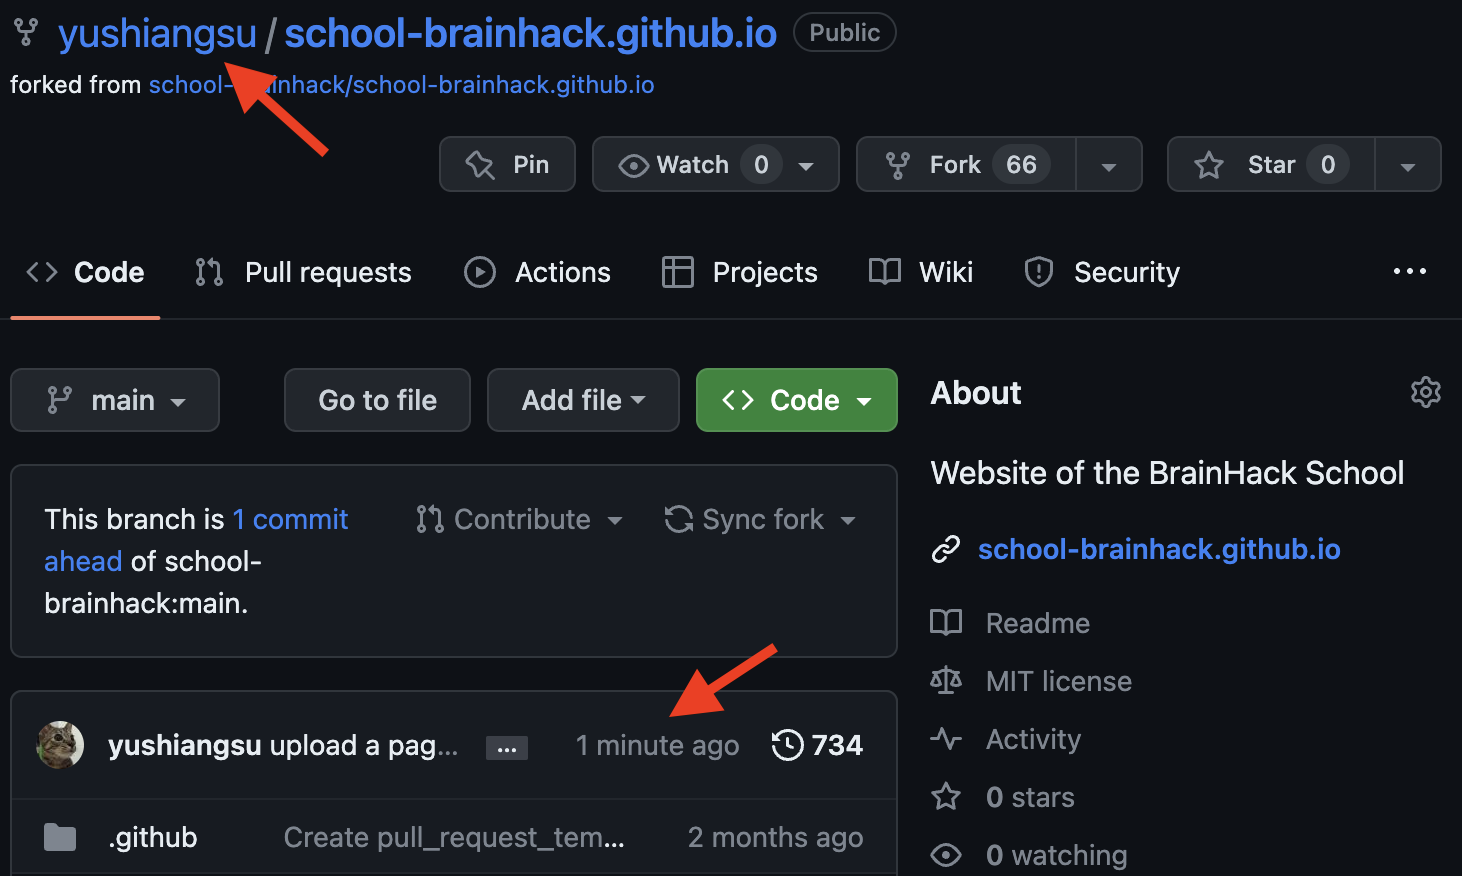
You should see that you commit the changes for your project on the forked repository.
-
Then, get back to the original Github repository for Brainhack School website. We will send a pull request. (step 1:) First, click the pull request, (step 2:) then click an option called compare across forks, (step 3:) select your
/school-brainhack.github.io.git as the head repository. (step 4:) Check all the commits are correct. (step 5:) Then the final step is click the create pull request and confirm the pull request. 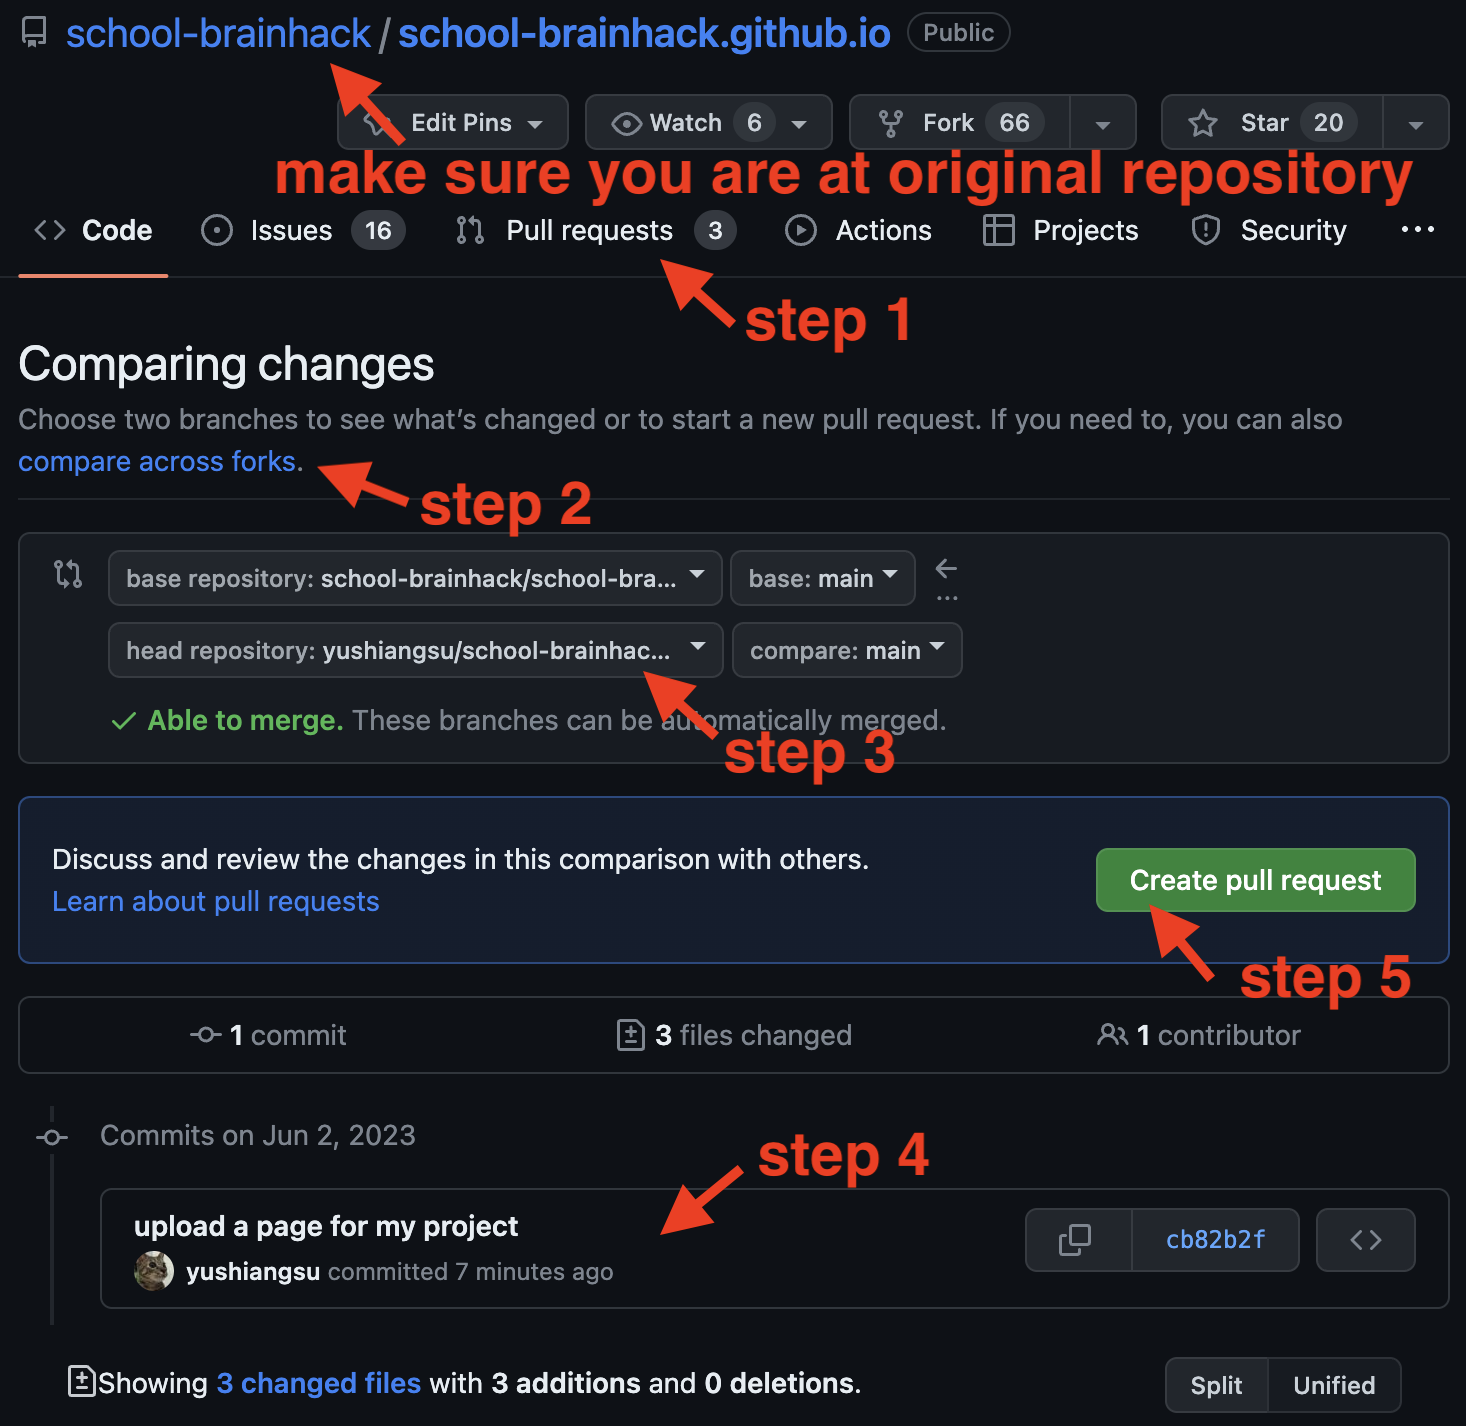
-
We will review your pull request, and some revisions might be needed. Please be patient and help us to revise your request accordingly.